Now relationship-building and customer relations management is easier than ever with the new Dynamics - Greenvelope integration. Integrating with Dynamics allows Greenvelope users to directly import contacts from Dynamics campaigns and sync RSVP data back into campaign member statuses in real time. The best part is configuring the integration is simple by following the steps below, and the configuration does not require a developer.
Obtaining your Dynamics Key and Secret Token:
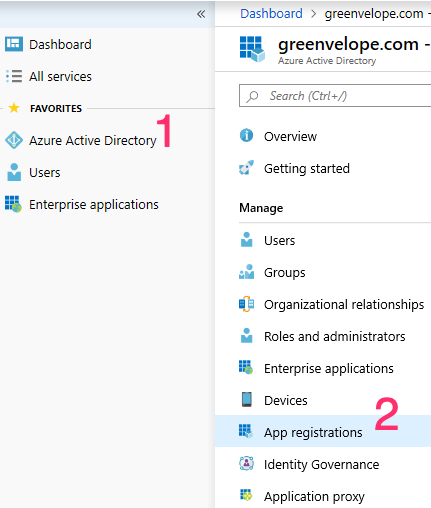
Step 1: Log in to your Azure Active Directory Admin Center and click “Azure Active Directory” on the side navigation.
Step 2: Click “App registrations” in the new sidebar sub-navigation.
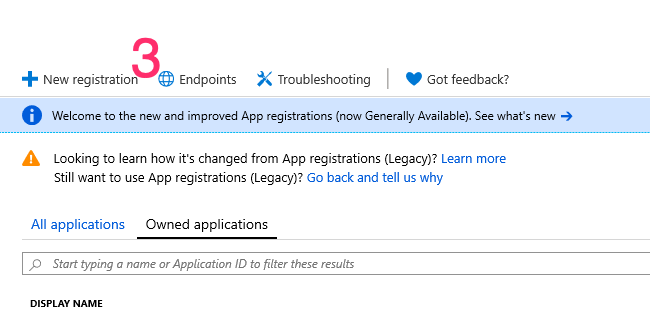
Step 3: Click the “+ New registration” button.
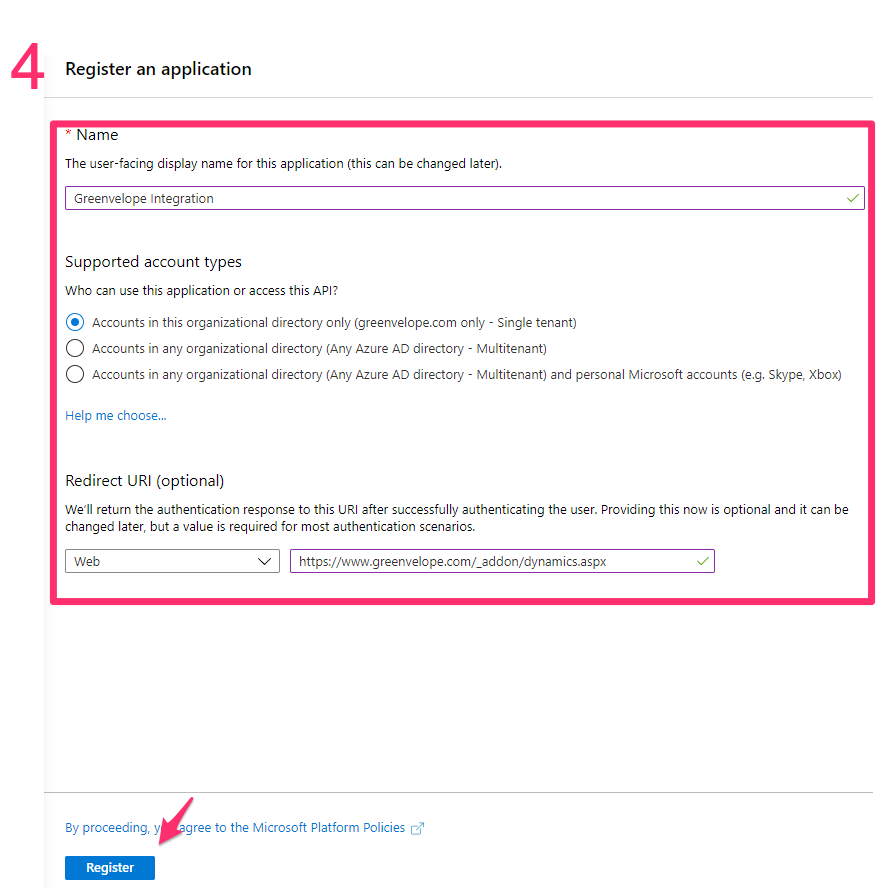
Step 4: In the "New Connected App" page configure your application as follows and click "Register":
- Name: Greenvelope Integration (Note that you can use a different name if desired)
- Supported Account Types: Accounts in this organizational directory only (greenvelope.com only - Single tenant)
- URI: https://www.greenvelope.com/_addon/dynamics.aspx
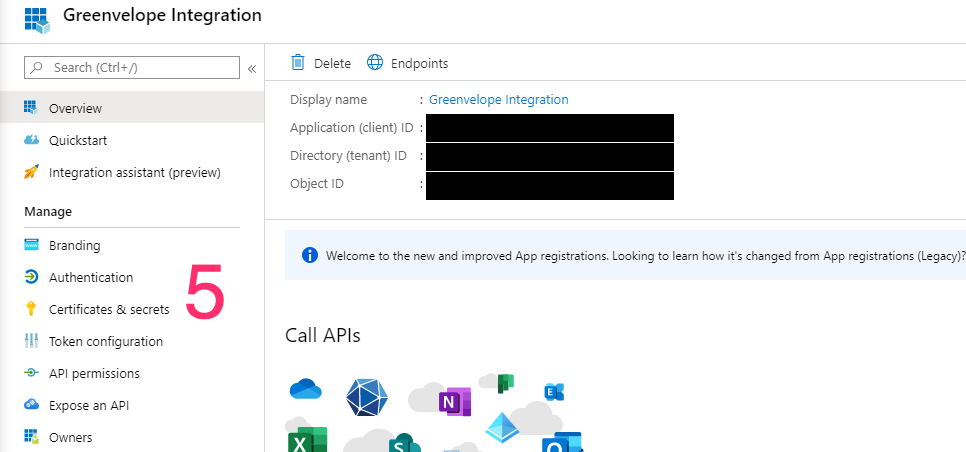
Step 5: On the next page (the “Greenvelope Integration” application page), click the “Certificates & secrets” link in the sidebar menu.
Step 6: Click the “+ New client secret” button. Configure the client secret as follows and click “Add”:
- Description: Greenvelope Integration
- Expires: Never
Step 7: Copy the secret and save for later use.
Step 8: Click the “Overview” link in the sidebar navigation and copy the “Application (client) ID” to save for later use.
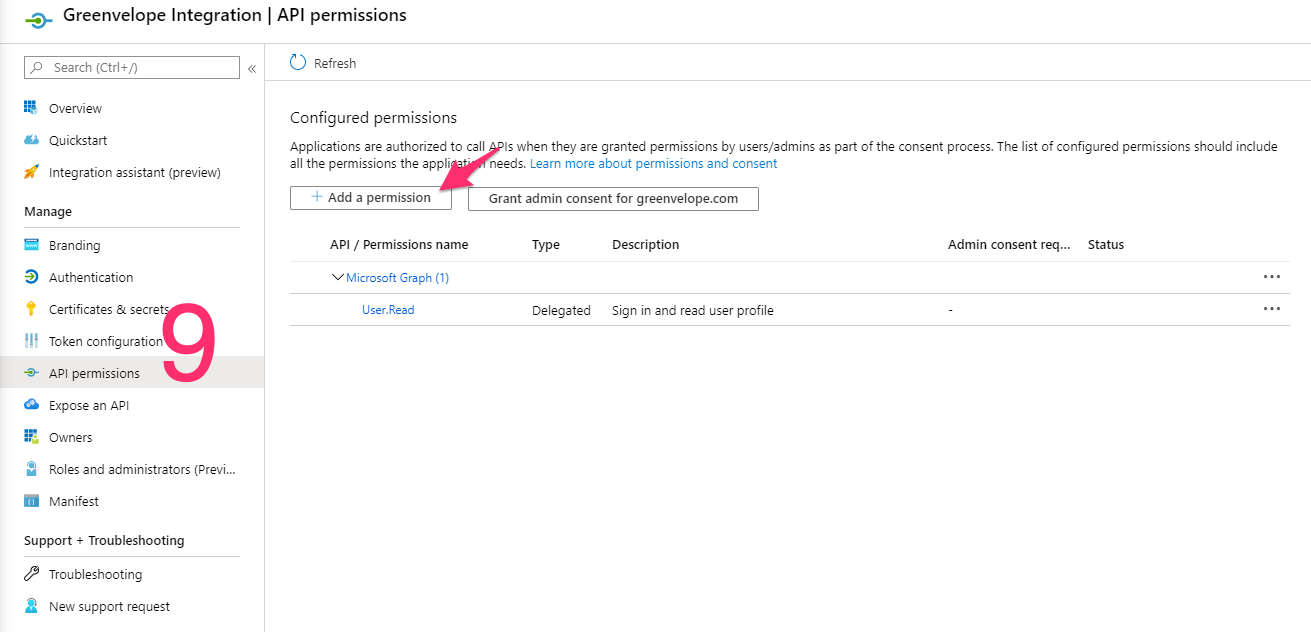
Step 9: Click the “API Permissions” link in the sidebar navigation. Then click the “+ Add a permission” button.
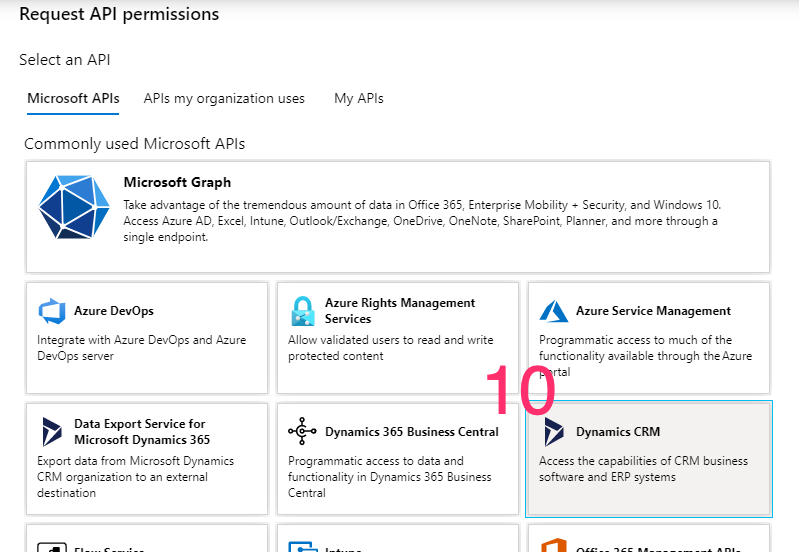
Step 10: Click the “Dynamics CRM” button in the Microsoft APIs listing.
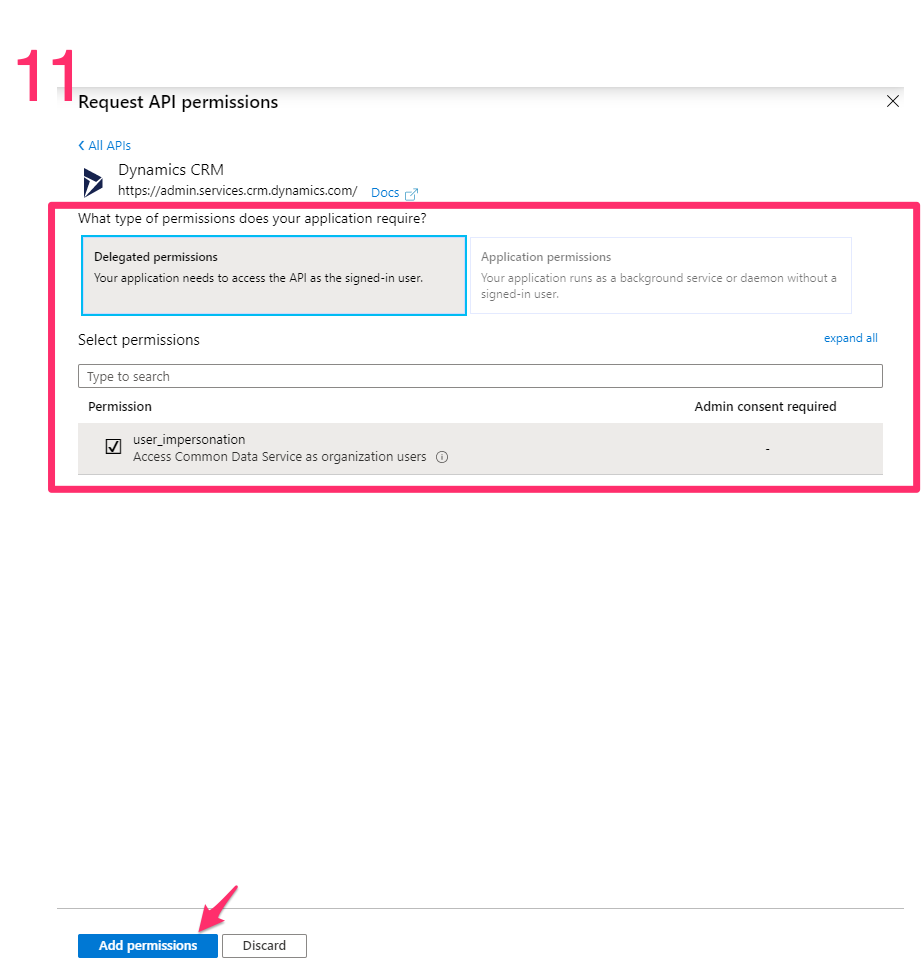
Step 11: Configure the permission request as follows, then click the “Add permissions”:
- What type of permissions does your application require: Delegated Permissions
- Permission: Check "user_impersonation"
How to Connect Dynamics:
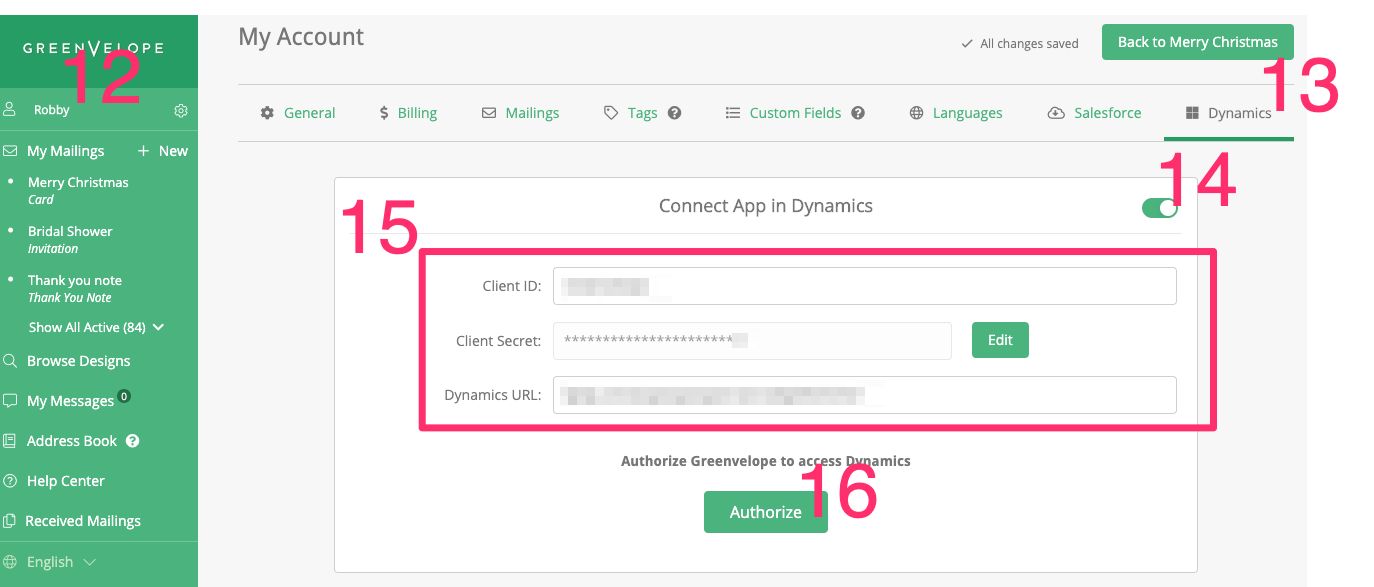
Step 12: Click the settings icon the left-side menu bar.Step 13: Select “Dynamics” in the top menu.
Step 14: Click the toggle to turn on the Dynamics integration.
Step 16: Click the “Authorize” button to be redirected to a Dynamics login form to complete the connection.
*NOTE* This process allows you to import contacts from Dynamics. For more information on automatically syncing RSVP data from Greenvelope to Dynamics click here.